
Hope you enjoyed the Shabby Chic chair tutorial. Today I'm going to show you how to brighten up a corner of your patio on a budget.
First of all though, what do you think of my blog overhaul? Looks great doesn't it?
Massive thanks go to Lisa Warren who has her own Blog and Digital Design service so if you're blog is looking a little tired or outdated, be sure to contact Lisa for a whole new fresh and funky blog overhaul.
This is a project I've shown briefly before but again, I had a few emails from people wanting to know how to do it so this post will be a run down on how it was done.
This house had a whole new verandah built on the front and while settling in I just put my pots, tables and chairs out there without a second glance.
Walking in the front gate one day I thought how plain it looked and decided to make myself a pretty little corner I can sit in and relax with a good book.
YOU WILL NEED:
A table (and chair if you like)
White paint
Glass coffee jars
Paper Doilies
Clear glue
Long sturdy sticks
This is what I started with:

I hit the table first with a sanding down then followed it by a whitewash of paint. Once dry I gave it a good sanding again to distress it evenly. That's ALL I did with the table.
Now for the pretties...I've been collecting old coffee jars just with this idea in mind so luckily I had them on hand and ready to go.
If you haven't already got some then GET SOME! Simply soak them in warm, soapy water and you'll find the labels will come off quite easily.
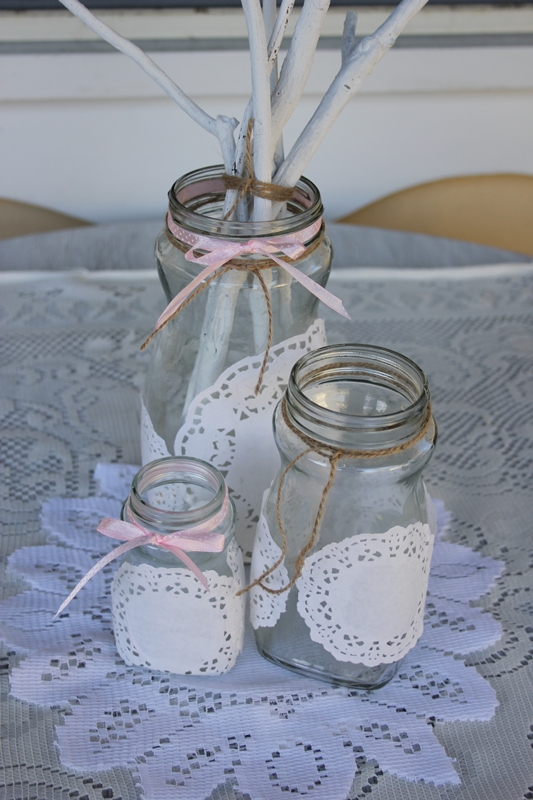
I used small paper doilies to funk up my coffee jars. These were positioned randomly on the jar and when I was satisfied with their placement I simply pasted the back of the doilies to the jar.
TIP: Use a clear drying glue for this step as it does get a little messy.
Set them aside to dry then embellish the tops with pretty ribbons and twine or whatever else takes your fancy.
TIP: These jars are also a fabulous way to present gifts. Simply keep the lid and decorate it and fill the jar with lollies, preserves, buttons or anything really.
Now...off we go for a walk. Yes..that's right! You can stay fit and craft at the same time!!
Collect some sticks from either your garden, surrounding bush or parks or pinch them from your neighbours yard.
Make sure you're sticks are sturdy and not too thin or they will break easy. So we're after STICKS not TWIGS!!
Once you're happy with your collection give them a slap of white paint. When they are dry tie some twine around the bottom to form a bunch and put them in your largest jar.
You could make some cute little paper embellishments such as birds or butterflies to hang from your sticks however mine are in a high wind area so I skipped that step for now.

Find a pretty tablecloth and doily to sit on your table and voila! You now have a sweet little spot on your patio to sit and enjoy the view.

COST:
Table - given to me
Paint - had on hand
Coffee jars - had on hand
Paper Doilies - had on hand
Sticks - found objects
Glue - had on hand
ALL UP:
This cost me nothing to refurbish/upcycle bar time.
TIME TO MAKE:
Half a day
Enjoy,
Sharryn xx
2 comments:
Gorgeous table Sharryn, love the twigs in a jar idea!
Cool blog, I really like the rig idea too.
driveway paving Brentwood
Post a Comment