
Wow 2 blog posts in 2 days...go me!
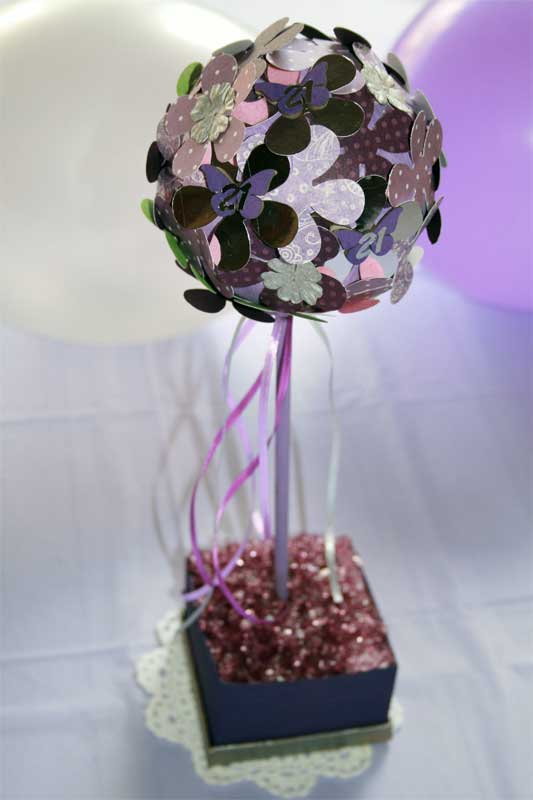
Last Saturday night was our daughter's 21st birthday and I wanted to make my own decorations just to add a more personal touch. I decided on topiary tree table decorations as I love topiary trees and think they lend a touch of class. So I made my own and took photos along the way for those of you interested in perhaps making your own one day as they are much more cost efficient than purchasing them. With the basic steps, you can create your own topiary tree to suit any occasion.
YOU WILL NEED:
2 x Styrofoam balls (depending on the finished size you want)
1 length of 6mm dowel
1 x paper mache gift box
bag of glass crystals
patterned papers in colours of choice
acrylic paint
ribbons
small flowers
chipboard butterflies
ink
clear drying craft glue
flower punch
TO MAKE:
1)Paint your styrofoam ball in a colour to match the patterned papers you will be using. This will hide any unneccessary white patches that you may not fill. Set aside to dry.

2)Take your paper mache gift box:

Paint the lid and the main part two different colours. The lid will become a holder for the bottom of the box. Set both pieces aside to dry.

3)Take your large flower punch and start punching flowers from different co-ordinating patterned papers.

Mark a hole where the dowel rod will go on the styrofoam ball so as not to cover with the flowers.
Using a clear, strong craft glue attach the punched flowers to the styrofoam ball.I only glued the centre of my flowers as I wanted a 3D effect on the finished product.

Continue glueing flowers on until the styrofoam ball is completely covered.

4) Measure the length of dowel you will need and paint to suit colour scheme. Set aside to dry.

5) Get your small flowers and other embellishments for your styrofoam ball ready. I didn't have the right colour flowers I needed so I inked some small paper flowers silver.

Ink some small chipboard butterflies to suit. (I then added some 21 embellishments over the top however you can change this to suit the occasion).

6) Now that your dowel rod is dry,glue the end and pierce it through the styrofoam ball at the spot previously marked.

Take the second stryofoam ball and cut it to fit inside the paper mache gift box. Take care with this step as pieces of styrofoam will harm small children if swallowed so be sure to clean up properly. It doesn't matter at this stage if the styrofoam in the box looks a bit skew whiff as it will be covered later. Just ensure it is a snug fit and will hold the topiary tree upright. Glue the end of the dowel rod as in the previous step and insert it through the styrofoam in the box. Hold gently for a few minutes to ensure it dries in the correct position.

7) Now that your topiary tree is in place, add your small paper flowers and chipboard embellishments. This gives you a better idea of placement.
8) Now the fun, but very messy part. Pour some glass crystals on to a paper plate. You might want to grab yourself a spoon at this stage!

Pour some clear, strong craft glue over the glass crystals and mix up with your hands ensuring the glue covers all the crystals. (Ewww...I really don't like this part) TIP: If you can't find glass crystals you can use spanish moss.

Spoon the mixture carefully over the styrofoam base making sure to get into all cracks and crevices. Keep adding crystals until they are level with the top of the paper mache box lip. Again, gently hold the topiary tree in place for a few minutes so it will dry in place. The crystals took a couple of hours to dry completely.

9) Measure the length from the base of the topiary tree ball to the top of the crystals and cut lengths of co-ordinating ribbon.

Tie them in a knot around the base letting them fall freely.

10) Let topiary tree completely dry then enjoy your lovely new table decoration.
I hope this tutorial was clear enough to understand, if not just email me and ask away.
Cheers
Shaz
xx
No comments:
Post a Comment